Common Body Kit Mistakes & How to Avoid Them
Most body kit installations go wrong before a single bolt is tightened. The most common mistakes are buying the wrong material for how the car is used, skipping the dry fit before paint, ignoring ADAS sensors, using cheap hardware, and underestimating the total cost of labour and prep. If you get those five things right, you are already ahead of most builds you see online.
But there is more to it than that. The gap between a clean, professional-looking body kit and one that looks wavy, misaligned, and overpriced is usually just knowledge. This guide covers every major mistake, from chassis compatibility to UK MOT legality, along with the exact steps to fix or avoid each one.
Quick Reference: Common Body Kit Mistakes at a Glance
Use this table for a quick overview before you read the full sections.
|
Mistake |
Why It Happens |
How to Avoid It |
|
Wrong compatibility |
Assuming make/model is enough |
Verify chassis code, production month, and trim level |
|
Wrong material |
Buying on price alone |
Match material to how the car is used daily vs track |
|
No dry fit before paint |
Eagerness to finish fast |
Always fit raw, unpainted parts first and adjust |
|
Aerodynamic imbalance |
Adding a front kit without a rear balance |
Match the splitter with the diffuser and the rear wing |
|
ADAS sensor failure |
Thicker bumper blocks sensors |
Countersink sensor holes; recalibrate radar units |
|
Cheap hardware |
Using the included bag of screws |
Use stainless steel fasteners, VHB tape, and Cleco pins |
|
Underestimating labor cost |
Budgeting only for the kit parts |
Budget GBP 1,200 to GBP 2,500 for installation and paint |
|
Legal and insurance gaps |
Not notifying the insurer or checking the MOT rules |
Declare modifications; check MOT lighting and edge rules |
Mistake 1: Buying Without Checking Exact Chassis Compatibility
The most expensive assumption in the body kit world is that a car's name guarantees fitment. It does not. Car manufacturers quietly revise mounting bracket positions, headlight geometry, and bumper attachment points throughout a model's production run without changing the car's name or outward look.
A kit listed as fitting a 2017 model may bind severely against the 2019 version of the same car, even though both look identical from the outside. These are called mid-cycle refreshes or running production changes, and they affect fitment without warning.
Regional Spec Differences Are a Serious Fitment Issue
A body kit made for a Japanese Domestic Market (JDM) car will frequently fail to fit a UK, US, or Australian version of the same vehicle. Western market cars carry larger, heavier crash bars and high-density impact absorbers behind the bumper covers to meet stricter crash safety laws. Forcing a JDM-spec kit over a UK-spec crash bar warps the bumper cover and makes flush fitment impossible without removing the safety component, which is both dangerous and illegal.
Trim level differences also matter. A base model may not have the fog light housings, parking sensor arrays, or under-tray mounting points that a kit designed for the flagship trim level expects to find.
How to Check Compatibility Properly
- Find your chassis production code from the door jamb sticker or VIN decoder, not just the model year.
- Cross-reference the VIN with the manufacturer's parts catalogue to confirm if any bumper revisions were made during your build date.
- Contact the kit supplier directly with your exact chassis code before purchasing.
- Check owner forums for your specific model to see real fitment reports from other buyers.
- Never buy a kit listed only as 'universal fit' for complex bumper or skirt applications.
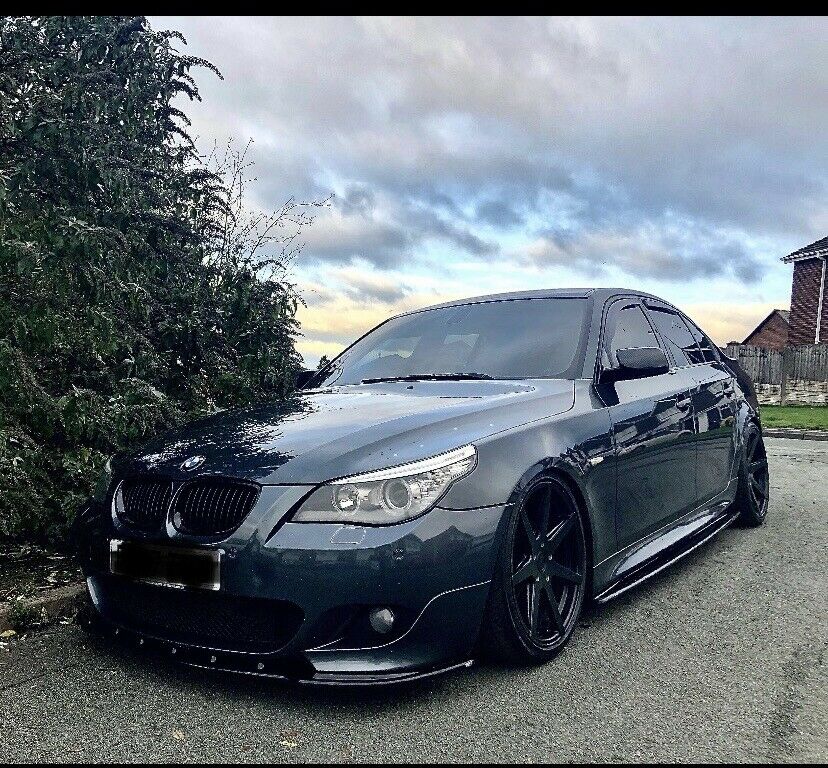
Mistake 2: Choosing the Wrong Body Kit Material
Body kit materials behave completely differently under impact, heat, and everyday road conditions. Buying a kit based on price alone, without understanding the material, is the most common reason kits crack, warp, or fall off within a year.
Here is a direct comparison of the four main materials used in aftermarket body kits today.
|
Material |
Best For |
Main Risk |
Approximate Kit Price Range |
|
fibreglass(FRP) |
Track-only builds, custom fabrication |
Shatters on impact, cracks from road vibration |
GBP 200 to GBP 800 |
|
Polyurethane (PU/PUR) |
Daily drivers, speed bumps, steep driveways |
Heavier, it can warp in the heat during shipping |
GBP 350 to GBP 1,200 |
|
ABS Plastic |
High-end brand kits, OEM-level fit |
Rare in custom kits, needs careful cleaning |
GBP 400 to GBP 1,500 |
|
Dry Carbon Fibre |
Performance cars, motorsport |
Very expensive, needs UV clear coat protection |
GBP 1,500 to GBP 8,000+ |
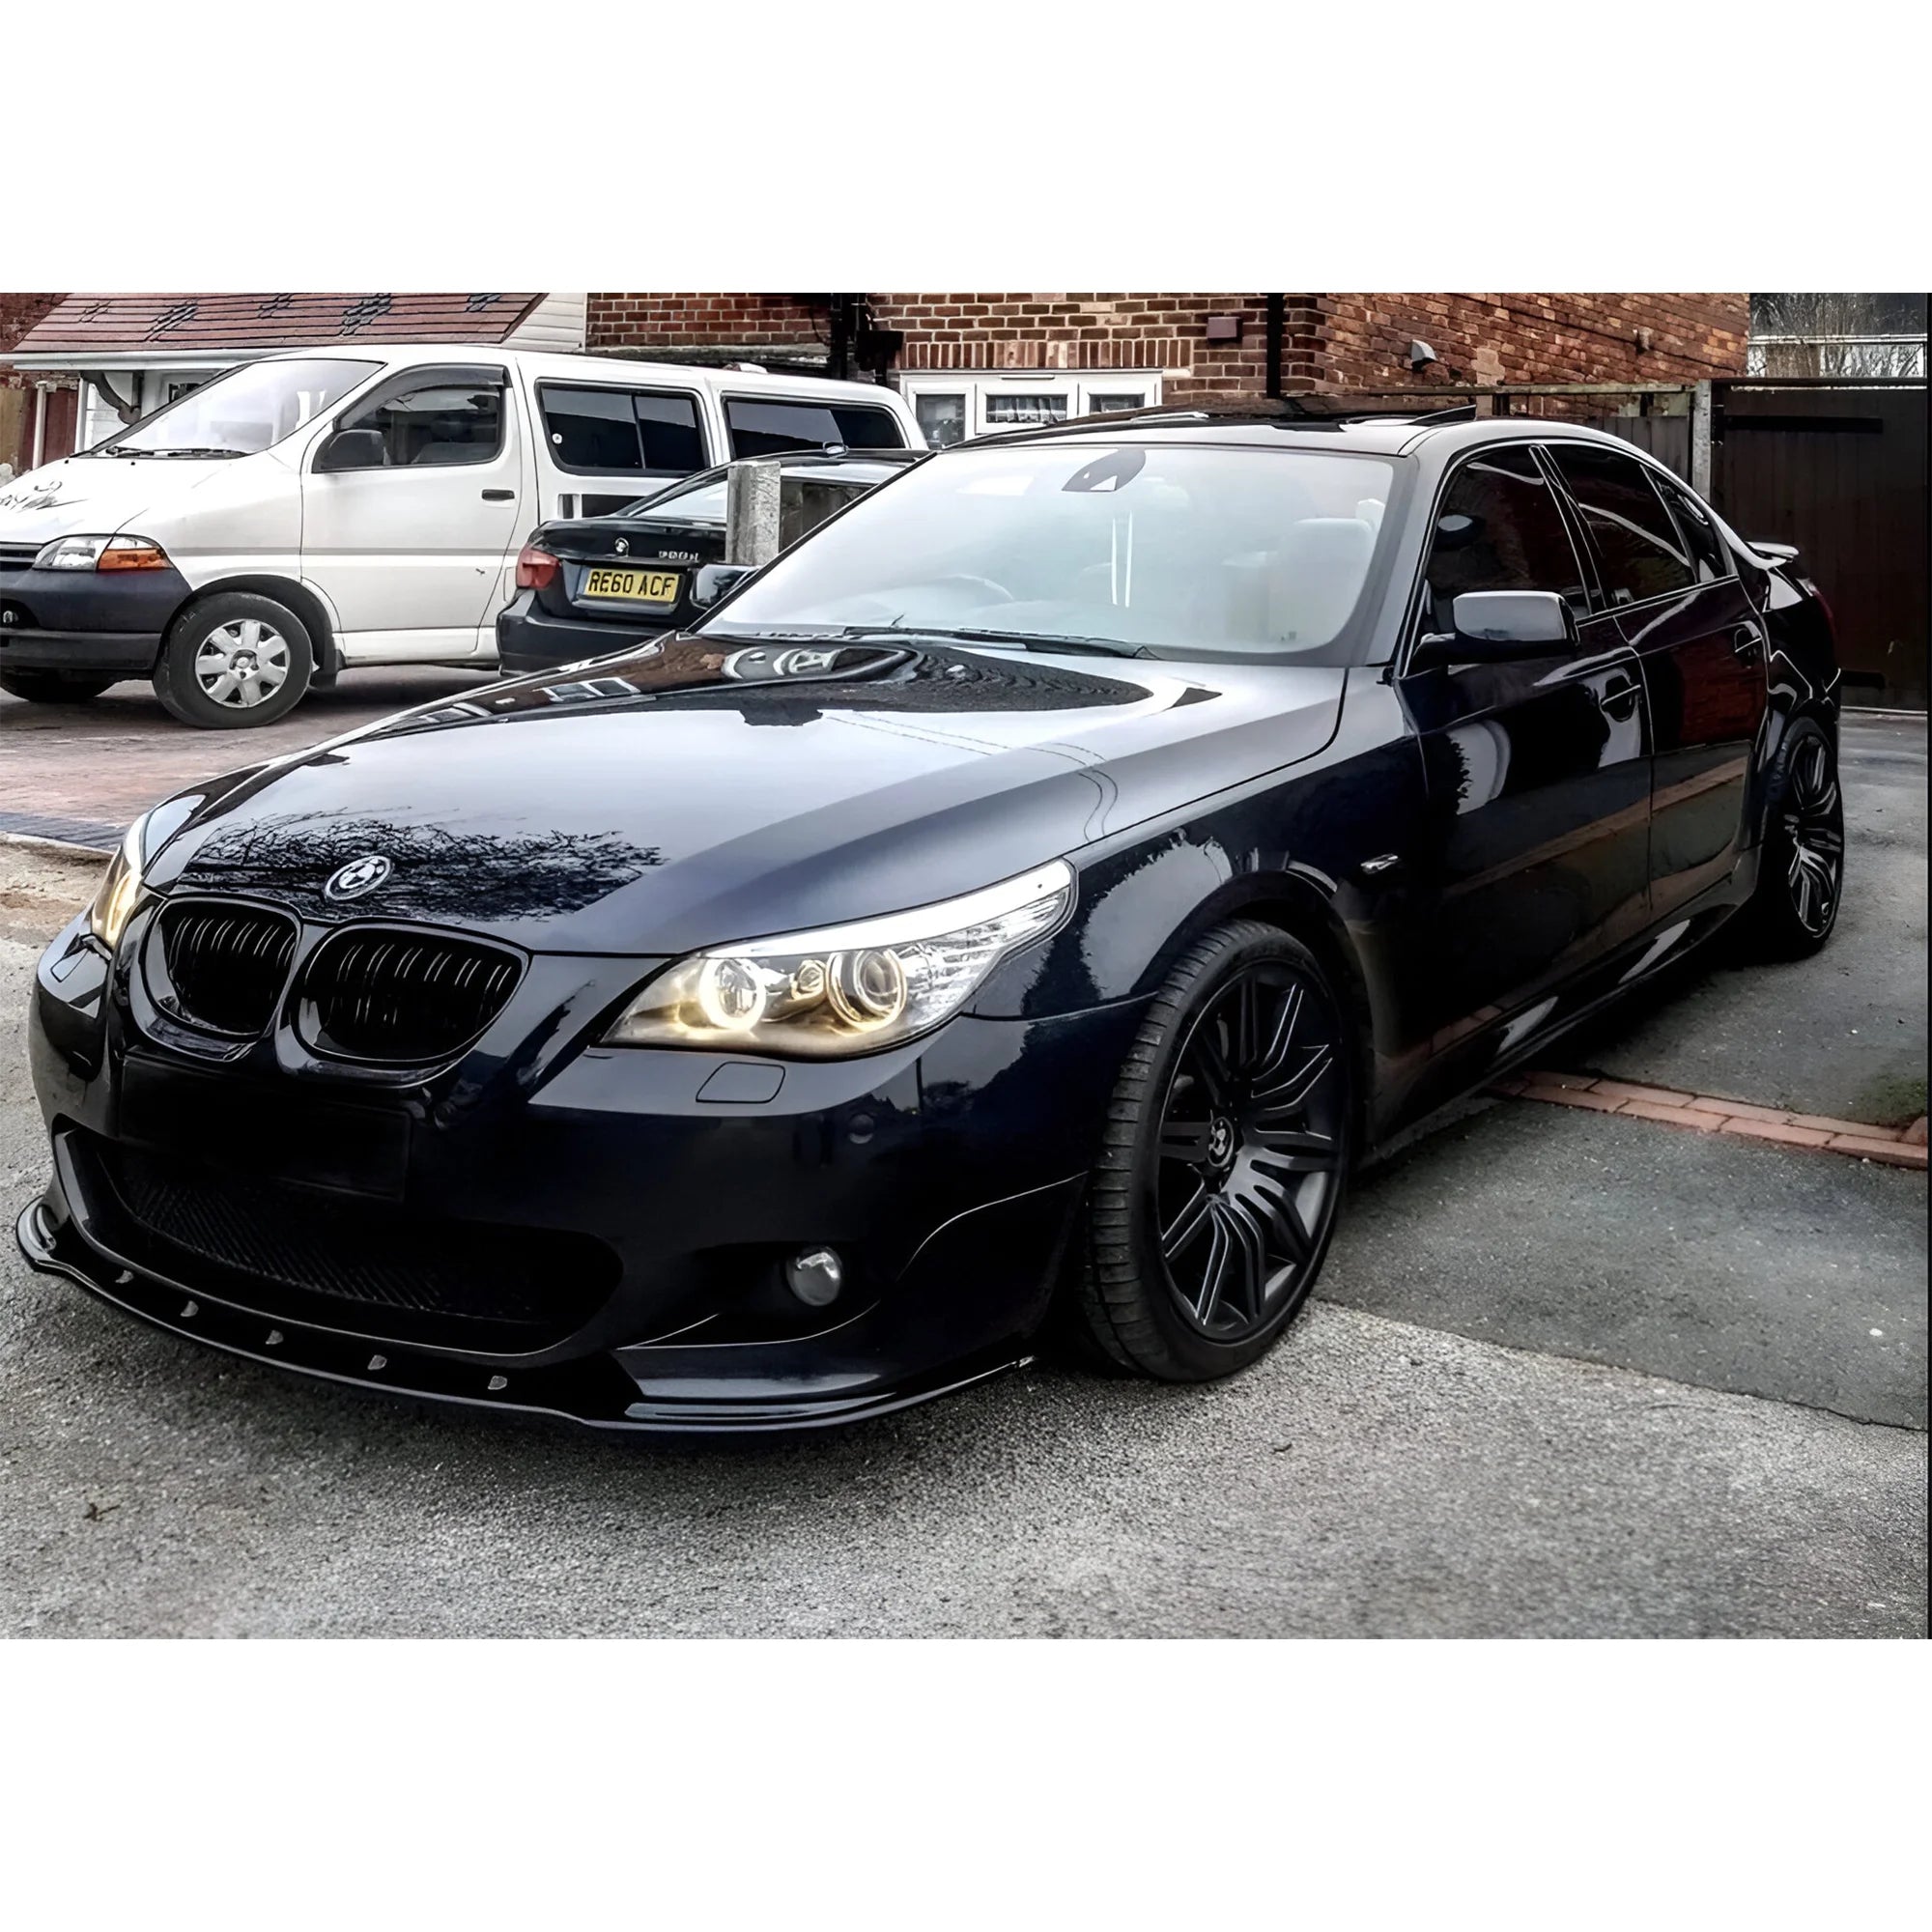
Polyurethane vs Fibreglass: Which One Is Right for You
Polyurethane is the right choice for any car that drives on public roads daily. It flexes when it hits a kerb or a speed bump instead of cracking, and it has what is often called built-in memory, meaning it partially recovers its shape after minor impacts. It is heavier and can warp during long international shipping, but reshaping it with a heat gun takes only a few minutes before fitting.
Fibreglass is lighter and easier to cut and repair with resin, but it is brittle. One solid kerb strike at the wrong angle can split a fibreglass front lip clean through. On a dedicated track car where parts are considered consumable, fibreglass makes sense. On anything that parks in a city or navigates speed bumps, it is a liability.
Carbon Fibre Body Kits: Real vs Fake
Wet-laid carbon fibre, also called cosmetic carbon, is pressed with excess resin and has no structural advantage over fibreglass. Dry carbon fibre, cured under pressure in an autoclave, is genuinely strong and light but costs significantly more. If a carbon fibre kit is priced similarly to a fibreglass one, it is cosmetic carbon, not structural dry carbon.
Real dry carbon also needs a quality UV-resistant clear coat over it. Without it, the epoxy resin yellows and turns chalky within a couple of seasons of sun exposure.

Mistake 3: Skipping the Dry Fit Protocol Before Paint
Taking a raw body kit straight from the box to the paint booth is one of the most expensive mistakes a car owner can make. Aftermarket body panels almost never fit perfectly out of the mould. They require trimming, shaving, and adjusting before a single drop of primer goes on.
The dry fit protocol means bolting the raw, unpainted components onto the car first and inspecting every gap, clearance point, and mounting angle before committing to paint. Skipping this step means discovering fitment problems after the panel is already painted, which requires a complete respray.
What to Look for During a Dry Fit
- Panel gaps between the kit and the door edges, headlights, and bonnet
- Any section of the kit pressing against the wheel arch liner or suspension components
- Mounting hole positions that do not line up with the factory anchor points
- Any warping in the panel that pulls it away from the chassis line
- Areas where the bumper sits further away from the body than is acceptable
The Professional Dry Fit Method
Professionals use Cleco pins to temporarily hold panels in alignment during a mock-up. These are quick-release fasteners that slot into drilled holes and hold the panel flush while you inspect the fit from all angles. Once satisfied, the mounting holes can be slightly elongated (ovalized) to allow lateral adjustment and fine-tuning of panel gaps before the final fasteners go in.
Using a panel gap gauge at this stage ensures even, consistent spacing around every edge. This step takes several hours but saves the cost of a full respray later.

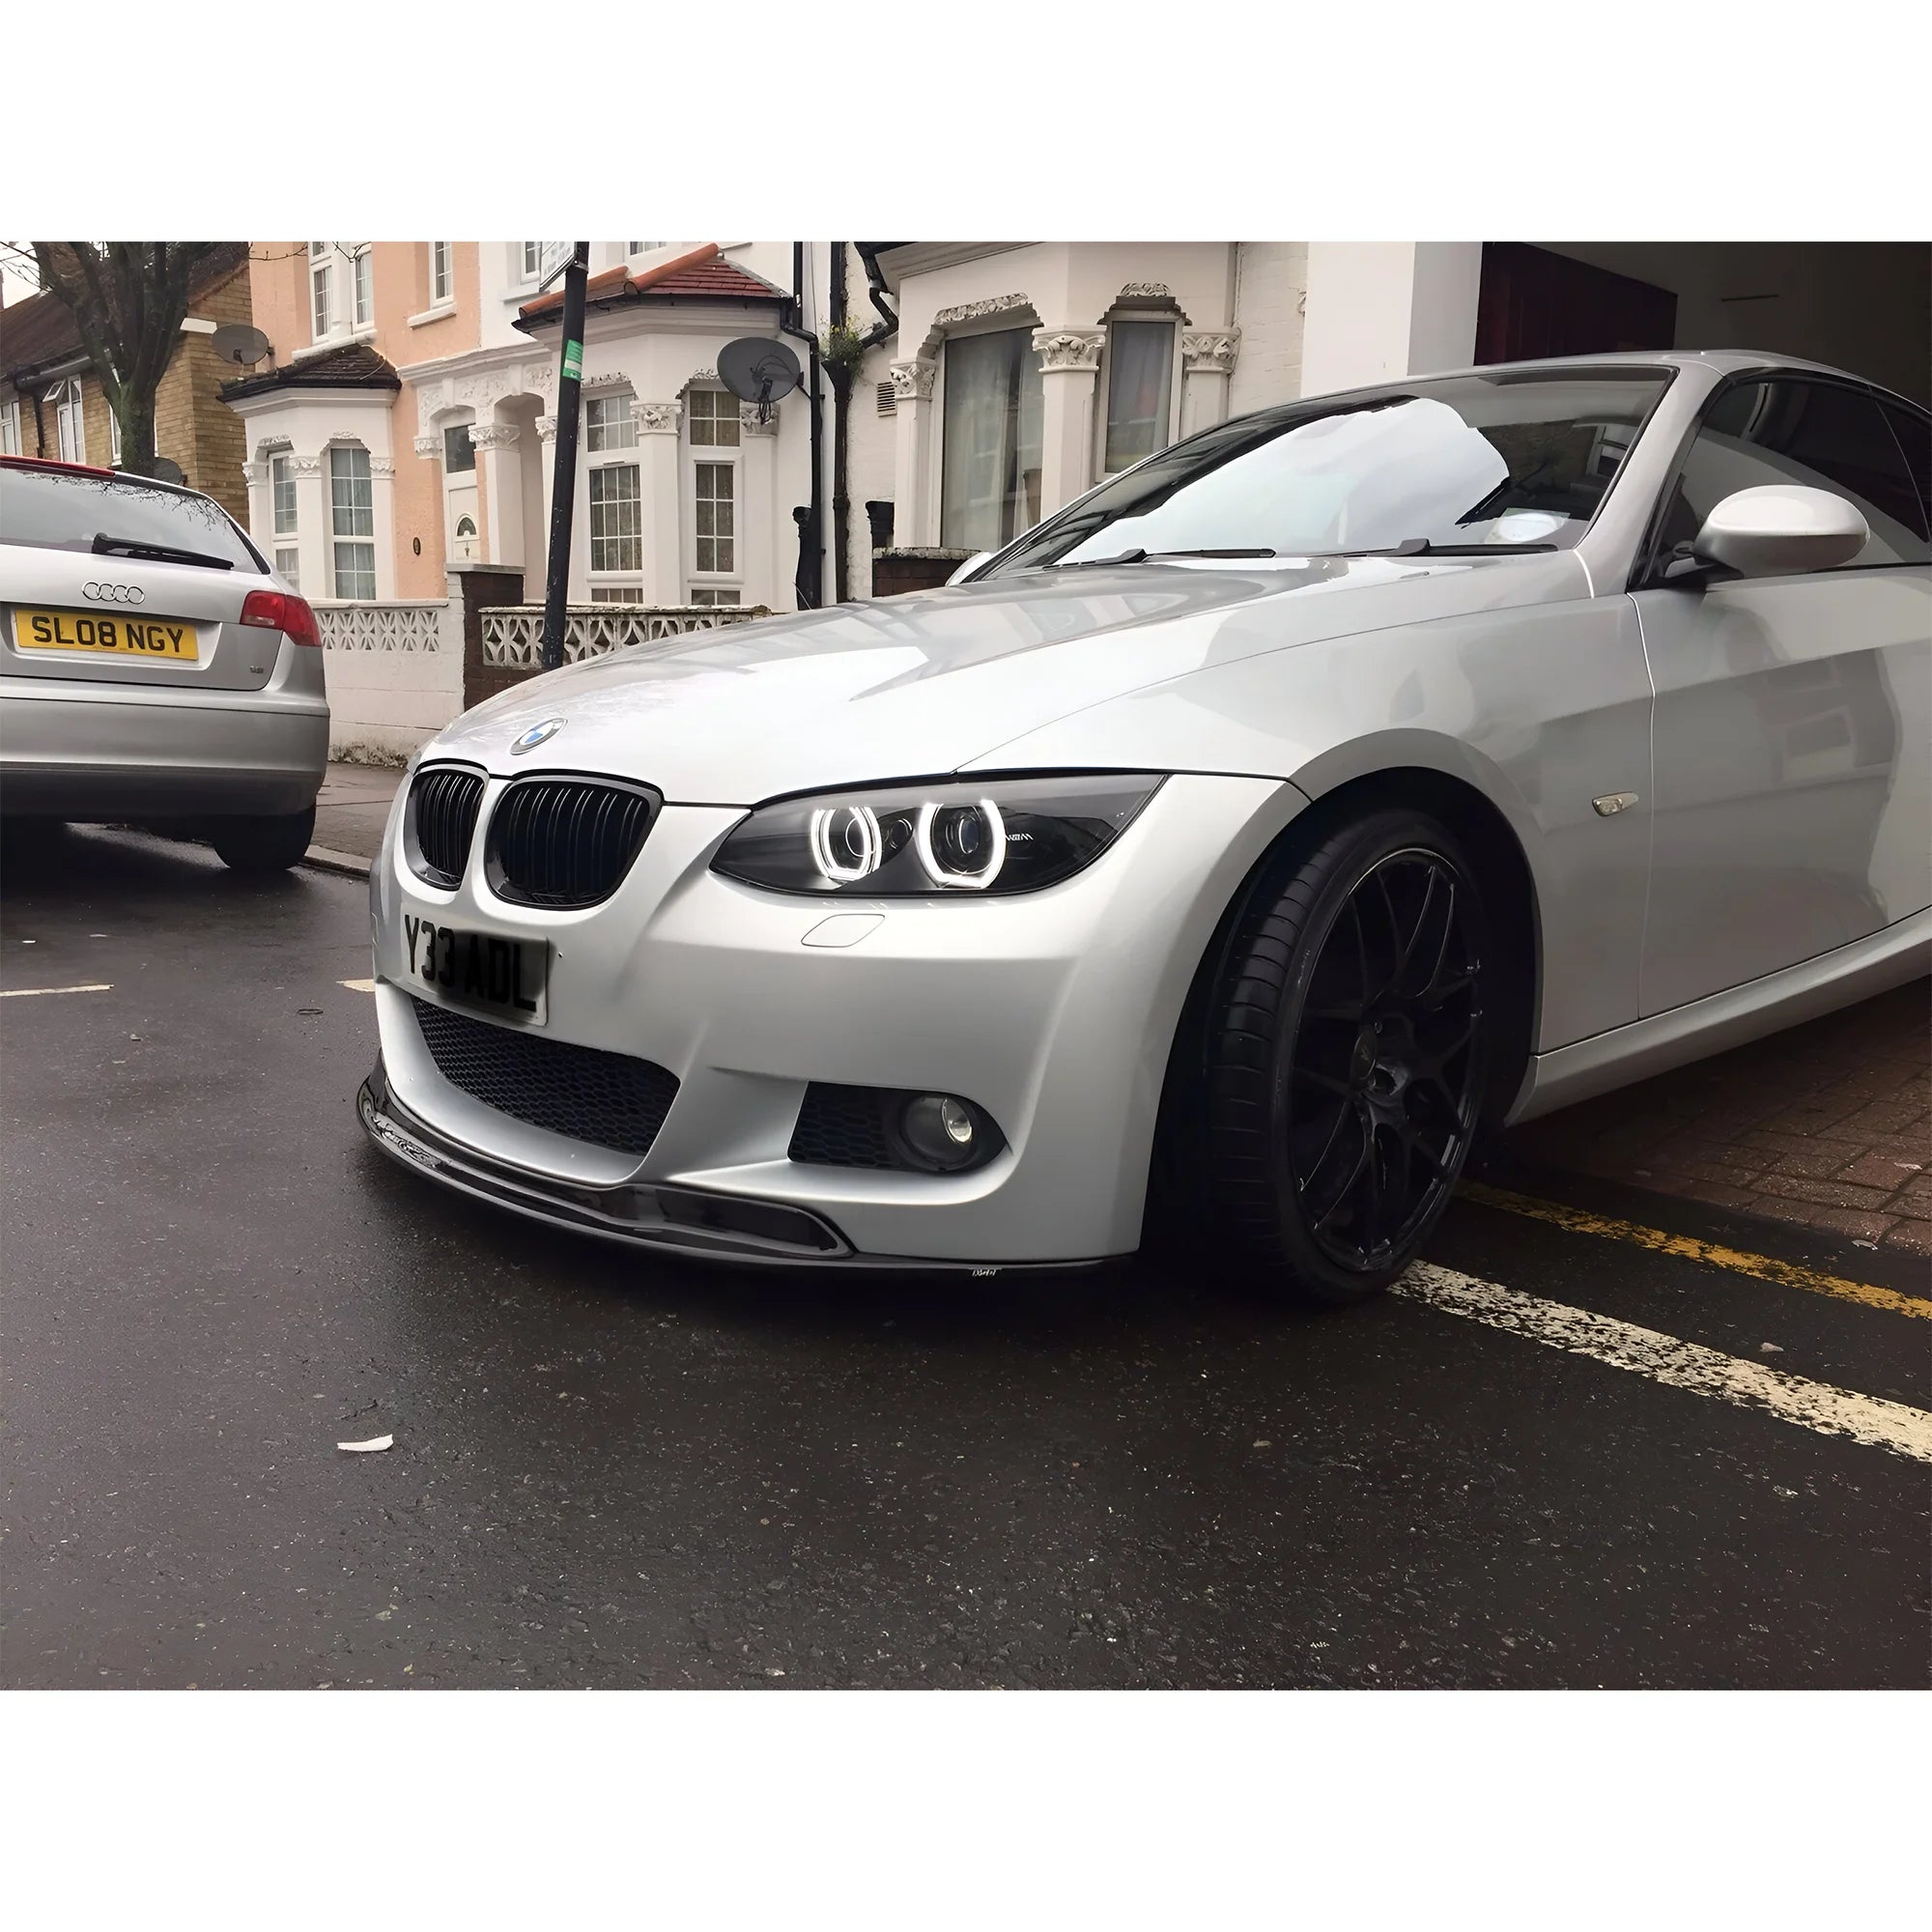
Mistake 4: Disrupting the Car's Aerodynamic Balance
Adding a front splitter or aggressive front bumper without balancing it with rear aerodynamic components creates a dangerous handling problem at speed. Automotive engineers spend thousands of hours tuning the way air moves over and under a car. Adding a single aggressive front component shifts the aerodynamic centre of pressure forward, which increases front downforce while leaving the rear light.
At motorway speeds, this imbalance causes the front to push down while the rear floats, producing unpredictable oversteer. This is not a theoretical risk. It is a consistent physics outcome, and it has caused serious accidents on track days.
Airflow and Cooling: The Hidden Cost of a New Front Bumper
A poorly designed front fascia can also starve the radiator of the air it needs. Factory bumpers are shaped to feed air directly through specific grille openings into the radiator and intercooler. Replacing the bumper with one that does not replicate those airflow channels causes overheating under sustained load.
This is a particularly well-documented issue on cars with bottom-breather intake designs. The new bumper blocks the low-pressure air channel that the factory designed to feed the engine, and the result is engine temperature warnings on the motorway.
The Right Way to Add Aerodynamic Components
- If you add a front splitter, balance it with a rear diffuser to keep the pressure distribution even.
- Check the grille opening dimensions of the replacement bumper before purchasing, and compare them to factory specs.
- Never close off or reduce the main radiator feed opening below factory dimensions.
- On high-powered cars, get aerodynamic advice from a specialist before adding wing or diffuser combinations.

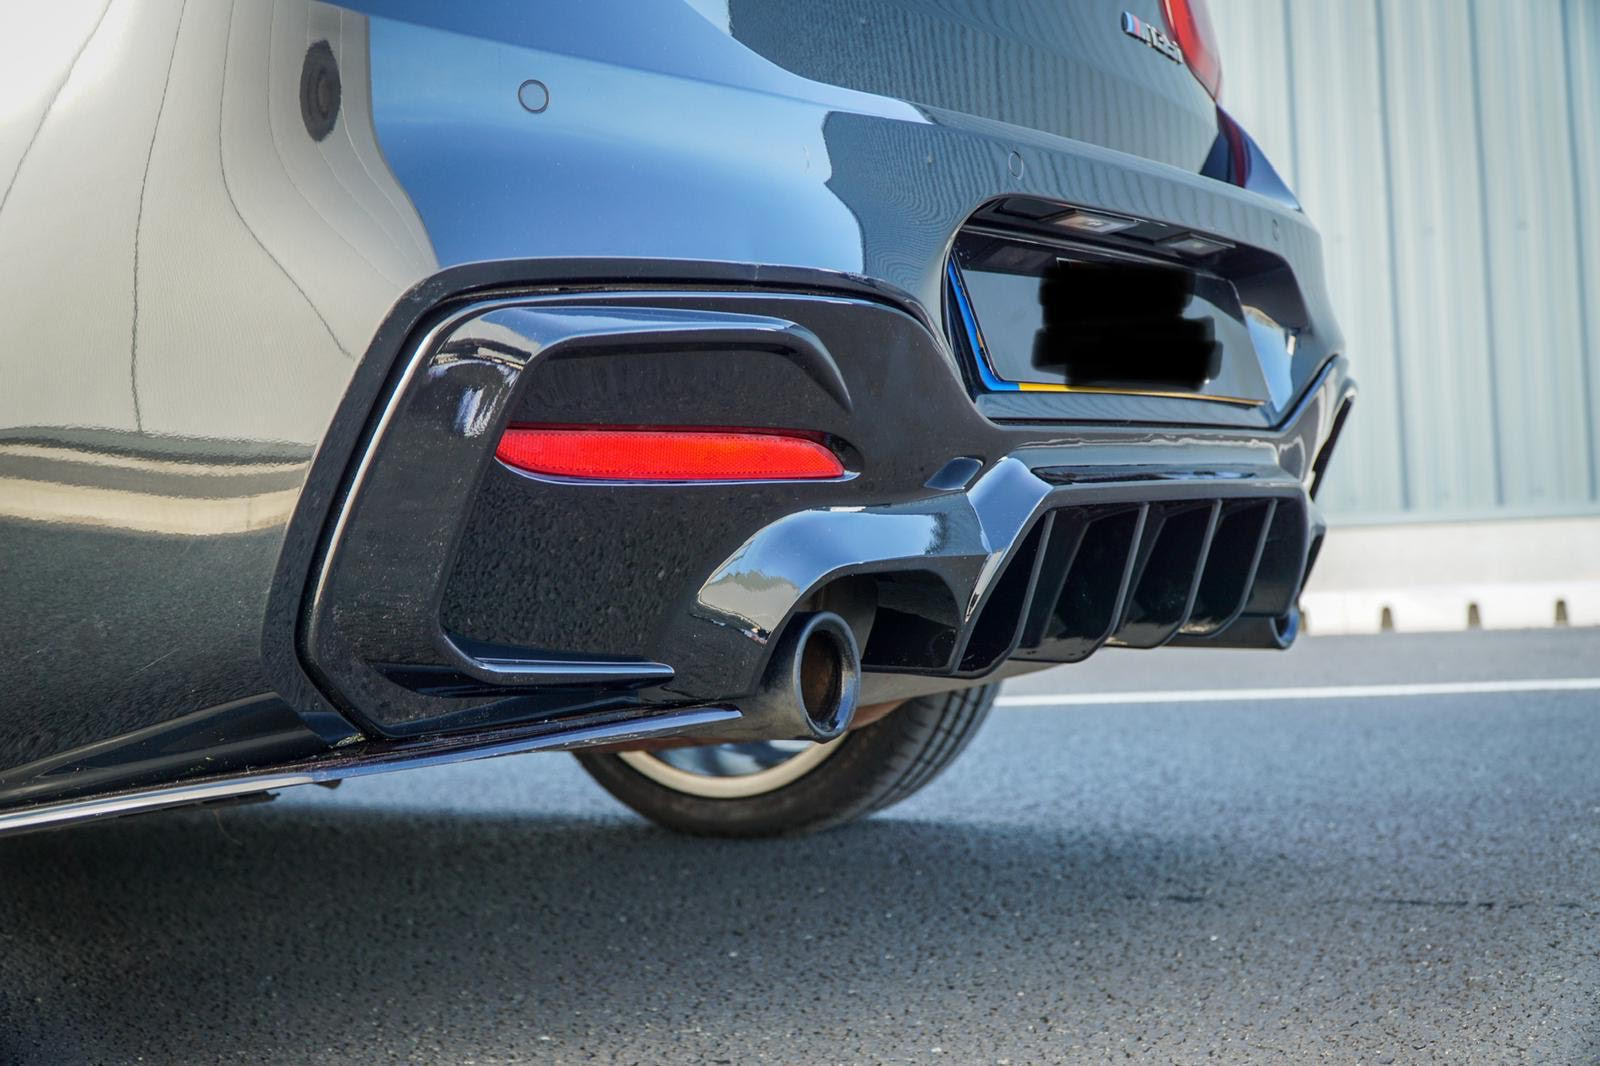
Mistake 5: Ignoring ADAS Sensors in Modern Cars
Any car built in the last eight years is very likely packed with sensors that live inside or directly behind the bumpers. Replacing a bumper with an aftermarket piece without accounting for these sensors causes persistent warning lights, false alerts, and complete failure of active safety systems.
The most common problem is what technicians call the bezel shadow problem. When an aftermarket bumper is thicker than the factory original, parking sensors sit too deep inside the holes drilled for them. The sensor's detection cone immediately picks up the edge of the bumper itself and triggers a constant proximity alarm inside the cabin.
Sensors Commonly Affected by Bumper Replacement
- Ultrasonic parking sensors (front and rear)
- Millimetre-wave radar for adaptive cruise control
- Camera systems for lane keep assist and automatic emergency braking
- Blind spot monitoring units are mounted inside the rear bumper corners
How to Handle Sensors Correctly
The rear face of the aftermarket bumper must be countersunk so that the sensor face sits flush with the outer surface of the bumper. If the sensor sits recessed, it reads the bumper itself as an obstacle.
For radar modules, even a one-degree change in the mounting angle caused by a bumper with slightly different geometry will make the adaptive cruise system inaccurate. After any bumper replacement on a car with radar-based safety systems, the car must go to a specialist for dynamic ADAS recalibration. This is not optional. Many workshops now refuse to pass a car for annual inspection if the ADAS system reports a calibration fault.

Mistake 6: Using the Wrong Fasteners and Hardware
Budget body kit suppliers often include a small bag of generic screws and clips with the kit. These corrode in road salt, degrade in UV light, and lose bond strength in summer heat. At speeds above 70 mph, aerodynamic load on a front splitter can easily reach 60 to 140 kg of force. That bag of self-tapping screws is not built for that.
Hardware That Actually Works
- Cleco pins: Hold panels in exact alignment during dry fitting before final holes are drilled, preventing the panel from shifting during mock-up
- Stainless steel fasteners with fender washers: Spread load across the substrate surface instead of concentrating it at one screw point, preventing pull-through on fibreglass and polyurethane
- 3M VHB tape: A legitimate professional retention method for skirts and lips when the surface is cleaned with isopropyl alcohol and treated with an adhesion promoter first. Skipping the promoter means the bond fails when the panel heats up
- Rivnuts: Create a threaded anchor in thin factory sheet metal without welding, far more reliable than self-tapping screws going into the same hole repeatedly
Ovalized mounting holes, drilled slightly elongated rather than perfectly round, allow lateral adjustment after fitting, so panel gaps can be set evenly before the fastener is tightened. This is a standard professional technique that most DIY builds skip, and it shows in the finished result
Mistake 7: Underestimating the True Cost of Body Kit Installation
The price of the kit itself is rarely the largest expense in a body kit build. Most enthusiasts budget for the parts and forget about everything else. This is how it builds up stall halfway through, with a car sitting on axle stands in a garage for months.
Real Cost Breakdown for a Full Body Kit Installation (UK)
|
Service / Item |
Estimated Cost Range (GBP) |
Notes |
|
Full body kit (bumpers, skirts) |
GBP 350 to GBP 1,500 |
Varies by material and brand |
|
Professional installation labour |
GBP 800 to GBP 1,800 |
15 to 25 hours at GBP 60 to GBP 90 per hour |
|
Paint preparation and spraying |
GBP 600 to GBP 1,200 |
Depends on finish, number of panels |
|
ADAS recalibration |
GBP 100 to GBP 350 |
Required if bumpers are replaced on modern cars |
|
Adhesion promoters, flex agents, primers |
GBP 80 to GBP 200 |
Material-specific prep products |
|
Hardware (fasteners, tape, sealers) |
GBP 50 to GBP 150 |
Budget for proper automotive-grade parts |
|
Widebody conversion (metal cutting/welding) |
GBP 3,500 to GBP 12,000+ |
Structural work adds high cost |
|
Total realistic budget (standard kit) |
GBP 2,000 to GBP 5,000 |
Kit, labour, paint, and prep combined |
Note: Prices may vary based on the extent of metalwork and quarter-panel cutting
A full body kit installation requires roughly 15 to 25 hours of professional workshop time. Quotes that come in significantly below this range almost always mean the shop is skipping the dry fit and panel preparation stages, which results in a wavy, misaligned finish that costs more to fix than the original quote saved.
If you are looking for a reliable starting point for pricing and kit selection in the UK, KSB Auto Styling (ksbautostyling.co.uk) provides transparent product listings across polyurethane, ABS, and carbon fibre kits with fitment details by model. This makes it easier to budget realistically before approaching a bodyshop.
Warning: If a shop quotes you GBP 400 for a full kit install and paint, they aren't doing you a favour. They are skipping the prep work that prevents the paint from peeling in six months.
Mistake 8: Overlooking UK Insurance, MOT, and Legal Requirements
Fitting a body kit without notifying your insurer is a breach of your policy terms. If you have an accident and the insurer discovers an undeclared modification, they can refuse the entire claim, leaving you liable for all repair costs.
Declaring a full body kit typically increases premiums by 10 to 20 per cent. Insurers view body kit modifications as increasing the car's repair cost, potentially altering its aerodynamic behaviour, and, in some cases, as a signal of modified driving habits. It is still worth declaring, because the alternative is having no cover at all.
UK MOT Compliance for Body Kits
For UK-registered vehicles, body kit additions must not obstruct lighting clusters, obscure indicator visibility, or cover any part of the number plate. Sharp edges that protrude beyond the vehicle's original profile can fail a pedestrian safety check during an MOT inspection. Some widebody kits that significantly extend the track width beyond 50mm may also require notification to the DVLA.
A Quick MOT Compliance Checklist for Body Kit Additions
- All headlights, indicators, and rear lights are fully visible from the required angles.
- Number plate unobstructed and correctly illuminated
- No sharp edges on front bumper or splitter that protrude beyond the original bodywork footprint
- Ground clearance sufficient to avoid contact with the road at normal ride height
- Wheel arch coverage is maintained if the track width increases

Body Kit Paint Preparation: What Most Buyers Get Wrong
Aftermarket body panels do not arrive ready for paint. They come from the mould with surface imperfections, release agent residue, and in the case of fibreglass, microscopic pinholes and a visible sand weave texture underneath. Sending a raw panel straight to a body shop that is not experienced with aftermarket components almost always produces the potato chip effect, which is a wavy, distorted reflection along the panel surface that is only visible after the lacquer dries and cannot be fixed without a full respray.
Each material needs a completely different preparation process before the primer goes anywhere near it.
- Polyurethane: Degrease with wax and silicone remover. Apply adhesion promoter across the entire surface and allow it to flash off. Use a flexible primer, and add flex agent to both the base coat and lacquer. Without a flex agent, the paint cracks the first time the bumper flexes over a speed bump.
- Fibreglass (FRP): Sand the entire surface with 80 to 120 grit to open the substrate. Apply high-build primer filler to fill pinholes and sand weave. Block sand completely flat and repeat until no low spots remain under a straight edge. Skipping this stage is the direct cause of the potato chip effect.
- ABS Plastic: Scuff with 320 grit and clean with isopropyl alcohol. An adhesion promoter is still recommended even though the standard primer bonds better to ABS than to other materials.
- Carbon Fibre: Clean with acetone and apply UV-stable clear coat as soon as possible after any sanding. Exposed epoxy resin yellows and turns chalky within a few months of sun exposure.
The dry fit must happen before any primer is applied. If a panel needs trimming, shaving, or redrilling after it has been sprayed, the paint is destroyed, and the panel needs a complete respray. No exceptions.
DIY vs Professional Body Kit Installation: Honest Comparison
This is one of the most searched questions in the body kit community. The honest answer is that the right choice depends entirely on what you are fitting and how much experience you have with bodywork and fabrication.
|
Scenario |
DIY Feasibility |
Recommended Approach |
|
Polyurethane front lip (clip-on or tape-on) |
High |
Mechanically inclined DIY with ramps and hand tools |
|
Rear diffuser (bolt-on to existing mounting points) |
High |
DIY with basic tools and Cleco pins for alignment |
|
Full bumper replacement (modern car with ADAS) |
Low |
Professional with ADAS recalibration capability |
|
Full fibreglass kit (bumpers, skirts, vents) |
Very Low |
Professional bodyshop with fabrication experience |
|
Widebody conversion (cutting quarter panels) |
Extremely Difficult |
Professional fabricator only; structural metalwork |
A full fibreglass body kit installation rates around 8 or 9 out of 10 in difficulty for someone without prior bodywork experience. The moulds are never perfect, which means every panel requires trimming, shaving, and adjusting before fit. Without proficiency with a Dremel tool, fibreglass repair resin, and panel gap gauges, the result will show.
For clip-on polyurethane lips and small extensions, DIY is very achievable with good preparation and patience. The key is never rushing past the dry fit stage.
Established specialist body kit retailers like KSB Auto Styling (ksbautostyling.co.uk) often supply fitting guides specific to the kit being purchased, which can significantly reduce the difficulty of a DIY installation on simpler components.
How to Fix Common Body Kit Problems After Installation
Fixing Uneven Panel Gaps and Misalignment
If gaps are visible between the kit and the body after installation, remove the panel and inspect the mounting points. The most common cause is a crash bar or inner bumper support that is pushing the outer skin away from the body. The hidden sections of the inner bumper face need to be carefully shaved down until the outer skin sits flush.
For side skirts that are wavy or sitting slightly away from the sill, use ovalized mounting holes to allow the panel to be pulled in and locked flat with 3M VHB tape as a secondary retention method. Never use expanding foam to fill gaps between the kit and the body. Expanding foam traps moisture against bare metal, causing rust.
Fixing Fibreglass Cracks and Spider-Webbing
Fine hairline cracks in the gel coat are called spider-webbing and are caused by road vibration and chassis flex working through the rigid fibreglass. For small cracks, clean the area, sand back to bare fibreglass, apply fibreglass repair resin, and re-prime. For larger structural cracks, the panel may need to be replaced.
To reduce the chance of future cracking, use rubber washers at all mounting points to absorb vibration, avoid lowering the car excessively below the kit's designed clearance, and consider switching vulnerable front lip components to polyurethane.
Correcting the Bezel Shadow Parking Sensor Problem
If parking sensors are constantly beeping after a bumper replacement, remove the sensors and inspect the depth at which they sit in the bumper. The sensor face needs to be flush with the outer surface. Countersink the rear of the bumper around each sensor hole until the sensor sits at the correct depth. Refit and test.
Body Kit Buying Checklist: Before You Spend a Penny
Use this checklist before purchasing any body kit to avoid the most common and most expensive mistakes.
- Confirm your exact chassis production code, not just the model year and name.
- Check the supplier's fitment notes for your specific chassis code and trim level.
- Ask the supplier what material the kit is made from, and confirm it matches your use case.
- Check whether the kit is designed for your market's specification (JDM, USDM, UK-spec).
- Ask if sensor cutouts or housings are included for your trim level's parking sensors.
- Request real customer photos of the kit fitted to the same car, not studio renders.
- Get quotes from at least two bodyshops before purchasing, to understand the total project cost.
- Confirm your insurer's process for declaring modifications before fitting begins.
- Check the kit against MOT lighting and projection requirements before ordering.
- Budget at least GBP 2,000 beyond the kit price for a standard installation and paint in the UK.
Final Thoughts: Getting Your Body Kit Build Right
Most body kit builds that go wrong are not failures of skill. They are failures of preparation. Buying the wrong material, skipping the dry fit, using the hardware bag that came with the kit, and not budgeting for proper installation and paint are the mistakes that account for the vast majority of wavy panels, persistent sensor warnings, and abandoned builds.
The difference between a clean build and a disaster is research done before the purchase, not after it. Verify your chassis code. Match your material to how the car is actually used. Budget for the full project cost, including labour, paint, and ADAS work. Declare the modification to your insurer before you start.
For UK buyers looking for a starting point on body kit selection by vehicle model, KSB Auto Styling at ksbautostyling.co.uk carries a range of polyurethane, ABS, and carbon fibre components with clear fitment information. Browsing their catalogue alongside this guide will help you understand what to look for before approaching a bodyshop.
If this guide saved you from a costly mistake, share it with anyone planning their first body kit build. The knowledge in here took thousands of failed builds to accumulate. Use it well.
FAQs
How difficult is it to install a full fibreglass body kit yourself?
For someone without prior bodywork or fabrication experience, it rates around 8 to 9 out of 10 in difficulty. Every panel will require some trimming, shaving, and refitting. You need a Dremel or angle grinder, fibreglass repair resin, panel gap gauges, and a very large tolerance for time and frustration. Without these tools and skills, a DIY attempt on a full fibreglass kit will result in visible gaps, wavy panels, and damaged paint.
Should I install my body kit myself or pay a professional?
For basic clip-on or tape-on polyurethane lips and small extensions, a careful DIY is possible. For full bumper replacements, fibreglass kits, or anything on a car with parking sensors and ADAS systems, use a professional. The cost difference between doing it right the first time professionally and paying to fix a DIY attempt is almost never in favour of the DIY route on complex work.
I have gaps along the side skirts, and the panels look wavy. How do I fix this?
Remove the panels and do a proper dry fit inspection. Check whether inner mounting brackets, sill trim, or factory clips are pushing the panel away from the body. Shave any obstruction from the hidden inner face. For the wavy look, use ovalized holes to allow lateral tension adjustment, and add 3M VHB tape with adhesion promoter to pull the panel flat. Never fill the gap with expanding foam. It traps moisture and causes rust.
Is it bad to drill into my factory body panels to fit a kit?
Drilling into factory sheet metal is irreversible and voids the factory anti-corrosion protection at every drill point. For widebody applications and heavy side skirts, it is sometimes structurally necessary. If you do drill, treat every exposed metal edge immediately with an anti-corrosion primer and seal with automotive silicone. Leaving bare metal exposed is a rust guarantee.
Will my body kit scrape on speed bumps and ruin daily driving?
Any kit that lowers the front splitter or extends the side skirts closer to the ground will reduce your ground clearance. Steep driveways and high-speed bumps become real obstacles. On a daily driver, use polyurethane or ABS plastic instead of fibreglass, as these materials survive minor scrapes without shattering. Approach steep inclines at an angle to increase effective clearance, and avoid lowering the suspension more than necessary.
Why does my fibreglass body kit keep cracking?
Fibreglass lacks flexibility. It cannot absorb kinetic energy by bending, so instead, the resin fractures. Road vibrations also work fine cracks into the gel coat over time. Use rubber isolation washers at all mounting points to reduce vibration transfer. If ground-level components keep cracking on a daily driver, switch to polyurethane for those specific parts. Save fibreglass for track use where parts are considered consumable.
How much does it actually cost to have a body kit professionally installed and painted in the UK?
A standard full kit covering front bumper, rear bumper, and side skirts requires 15 to 25 hours of labour. At UK bodyshop rates of roughly GBP 60 to GBP 90 per hour for specialist aftermarket work, installation, and painting, the typical cost is between GBP 1,200 and GBP 2,500. Any quote significantly below this range usually means the shop is skipping preparation stages, which shows in the finished result. A complex widebody conversion involving metal cutting and welding can exceed GBP 8,000 to GBP 12,000 in total labour.
Do I need to tell my insurance company about a body kit?
Yes, always. Fitting a body kit and not declaring it is a policy breach. If you make a claim after an accident and the insurer identifies undeclared modifications, they can refuse the entire claim. The premium increase for declaring a full body kit is typically 10 to 20 per cent, which is a much smaller cost than losing an insurance payout.
Can a body kit fail an MOT in the UK?
Yes. An MOT tester can fail a vehicle if the body kit obstructs lighting arrays, blocks indicator visibility, covers any part of the number plate, creates sharp edges that project beyond the original bodywork outline, or reduces ground clearance below a safe level. Check each of these points against your kit before fitting it. Kits from reputable suppliers will note whether components meet road legal standards in the UK